Are you wondering how to purchase a website domain name and start your own online presence? If yes, then don’t go anywhere.
A domain name is a vital element of your online identity. It not only gives you a name on the internet but also helps you establish your brand’s credibility online.
Nevertheless, buying a domain name can be a daunting task for some newcomers. You may find it difficult to navigate the initial steps and pick the perfect domain.
In this tutorial, we’ll walk you through the entire process of purchasing a website domain name. So, let’s start!
Things to Consider Before Buying a Domain Name
Before we learn how to purchase a website domain name, let’s take a look at some of the important things you need to consider.
1. Determine Your Website’s Purpose
First, it’s crucial to determine the purpose of your website. Knowing your site’s goals will guide you in choosing the perfect domain name.
Let’s break it down:

Why Are You Creating this Website?
First, ask yourself why you are creating this website. Is it for a personal blog, a business, an online store, or a portfolio? Your website’s purpose will heavily influence your domain name.
Here are a few examples:
- Personal Blog: If you’re starting a personal blog, then you might want a domain that reflects your personality or the topics you plan to write about.
- Business: For a business, the domain name should ideally match your business name or what your business does. This helps with branding and makes it easy for customers to find you online.
- Online Store: If you’re setting up an e-commerce site, then consider a name that is memorable and relates to the products you’re selling.
- Portfolio: For a portfolio website, especially if you’re a freelancer, using your name as the domain can be a good idea. It helps in building your personal brand.
Who is Your Target Audience?
Think about who will be visiting your website. Understanding your target audience can help you choose a domain name that appeals to them. For example:
- Young Audience: If your website targets a younger demographic, you might want a trendy and catchy domain name.
- Professional Audience: For a more professional audience, a straightforward and professional-sounding domain name would be more appropriate.
Once you’re clear on your purpose, you’ll find it much easier to brainstorm and select a domain name that truly represents your website.
2. Shortlist Possible Domain Names
After determining your website’s purpose, the next step is to come up with a list of potential domain names.
Start by brainstorming a list of words and phrases related to your website’s purpose. Don’t hold back, write down anything that comes to mind. Consider:
- Keywords: Think about the keywords related to your website’s content or business. For example, if you’re starting a bakery, words like “bake,” “bread,” “cake,” and “pastry” might come up.
- Branding: Reflect on your brand’s personality. Is it fun, serious, and professional? This can influence your choice of words.
- Audience: Consider the language and terms your target audience might use or find appealing.
Here’s a list of the best domain name generators to come up with a perfect name.
Once you have a list of words, start combining them to create potential domain names. Be creative and try different combinations. You can also modify words by adding prefixes, and suffixes, or blending them.
But make sure your domain name is easy to remember and type.

Once you have a list of potential domain names, check their availability. Many good names might already be taken. So, it’s essential to have several options.
You can also use domain name search tools like the ones provided by domain registrars, like Namecheap or Hostinger to see which names are still available.
Further, before making a final decision, get feedback from friends, family, or colleagues. They might offer valuable insights or suggest something you hadn’t thought of.
Ask them:
- Is the domain name easy to remember?
- Does it clearly convey what the website is about?
- Is it appealing to your target audience?
And finally, once you’ve narrowed down your list to a few strong candidates, consider reserving them immediately. Because domain names can be purchased quickly. So, it’s a good idea to secure your top choices as soon as possible.
3. Choose the Right Domain Extension
Choosing the right domain extension is a crucial part of buying a domain name. The domain extension, also known as a top-level domain (TLD), is the part that comes after the dot in a web address.
Domain extensions can tell visitors a lot about your website. For instance, they can indicate the type of website, its location, or its purpose.
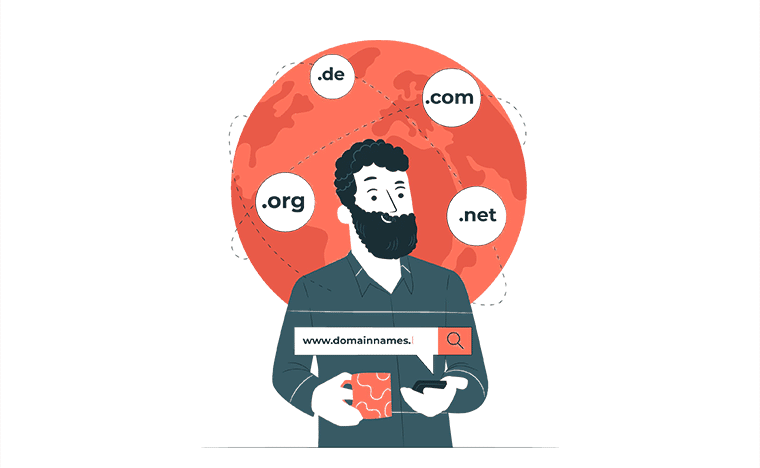
Here are some popular domain extensions to help you choose the right one:
| Domain Extensions | Description |
| .com | This is the most common and widely recognized domain extension. It stands for “commercial,” but it’s used by all types of websites. |
| .net | Originally intended for network-related businesses. Now a popular alternative to .com. |
| .org | This extension stands for “organization” and is commonly used by nonprofits, charities, and other non-commercial entities. |
| .co | Short for “company” and is often used by startups and entrepreneurs. It’s popular and is a good alternative if .com is unavailable. |
| .info | This extension is suitable for informational websites, such as wikis or resource centers. |
| .biz | Short for “business” and it’s a solid choice for e-commerce sites and business-related ventures. |
| Country-Specific Extensions | If your website targets a specific country, consider using a country code top-level domain (ccTLD). Like, .uk, .ca, .au, .np, etc. |
Moreover, when deciding on a domain extension, think about what your target audience expects. Most people assume a business will have a .com address, so if you’re a business, try to secure a .com domain if possible.
But try to be flexible! If your ideal domain with a .com extension is taken, then don’t be afraid to consider alternatives like .net or .co.
And, once you have a few domain names in mind, check their availability with different extensions. This can help you secure the best possible domain for your site.
4. Pick a Reliable Domain Name Registrar
Moving forward, you can begin your research on choosing the domain name registrar, where you’ll register the decided domain. Among the various options, we highly recommend the following platforms.
Get to know them now!
i. Namecheap
Namecheap is one of the long-standing domain name registrars, founded in 2000. Managing around 7 million domains for 3 million users, they are a top choice for both large and small businesses.

Moreover, it was named “Best Domain Registrar” in 2010 and “Most Popular Domain Name Registrar” in 2012. They also offer extra services like SSL certificates, app integration, and a marketplace for buying and selling domains.
Pricing
The prices of domain names also differ on Namecheap based on the extension. Best of all, you’ll receive free privacy protection with it, making it an affordable choice.
The table below includes the prices of some domain extensions:
| Domains / Pricing | .com | .net | .org |
| Registration Price (1st Year) | $5.98 | $12.98 | $7.98 |
| Regular Price (Per Year) | $13.98 | $14.98 | $12.98 |
Guess what? Namecheap offers a free domain with its shared hosting plans. Plus, it takes only 99 cents per year for domains on extensions like .store and .xyz. Learn about this offer here!
Find the best Namecheap alternatives to select based on your requirements.
ii. Hostinger
Hostinger is one of the most affordable hosting and domain providers. If you need a domain only or a hosting and domain package, Hostinger is the reliable provider we recommend using. Its hosting plans also offer a free domain for the 1st year.
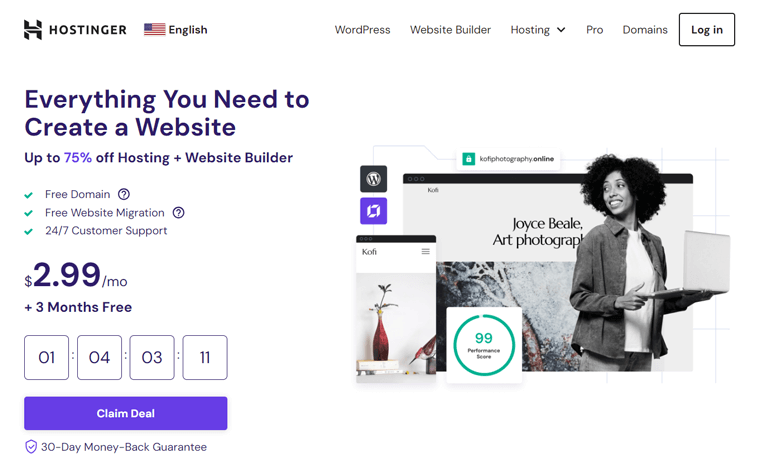
Moreover, it’s also one of the most popular domain registrars for small businesses, as a part of a select group of ICANN-accredited providers. You can choose from multiple TLDs, including .com, .online, .store, .tech, and more.
Pricing
The price of domain registration on Hostinger depends on the extension you pick. The table below includes prices for some of the popular extensions.
| Domain / Pricing | .com | .shop | .info |
| Registration Price (1st Year) | $4.99 | $0.99 | $9.99 |
| Renewal Price (Per Year) | $15.99 | $34.99 | $15.99 |
Reminder, you get free domain registration for a year in its hosting plans.
In fact, it’s best to register your domain for free with a Hostinger hosting plan for a year. Instead of renewing at a higher price on Hostinger, transfer your domain to Namecheap for a cheaper price.
Check out our in-depth guide on Hostinger here!
How to Purchase a Website Domain Name? (2 Ways)
Now, we’ll dive into the steps of purchasing a website domain name.
The steps can be different depending on your domain registrar. That’s why we’ll guide you on how to register a website domain name from 2 different providers.
The 2 domain name registration companies are Namecheap and Hostinger. Each of these has different features for your website that we’ll uncover later.
So, pick your provider and follow the steps below. Let’s begin!
1. Using a Namecheap Domain Registrar
If you want an affordable domain registrar, then go with Namecheap Domains. The process of purchasing and setting up the domain is also simpler.
Once you discover your website’s needs and shortlist the possible domains, follow the steps below. Here we go!
Step 1: Check Domain Availability
Initially, you must check the domain’s availability before proceeding with its registration. In addition, you may also want to first check the prices before making any decision.
So, visit the Namecheap website and hover over to the “Domains” menu. There, click the first option, “Domain Name Search”.

On this remarkable tool, enter your best domain name out of the shortlist along with the extension in the text box. Then, hit the “Search” button.

Within a few seconds, you’ll see a tick or cross mark on your desired domain, denoting if the name is available or not, respectively. If the domain name isn’t available, then you can do one of the following steps:
- Either way, choose a different extension available for the same name.
- Alter the domain name and use a different variation to try once again.
- Otherwise, move forward with a different domain and check its availability.
Note that, you can even use beast mode and come up with a unique domain name right there!
Step 2: Purchase Domain
Once you find the right domain, click the “Add to cart” button right next to it.

After the domain is added to the cart, Namecheap recommends buying other products that you may require. Once you’re done, click the “View Cart” button under the shopping cart icon on the navigation.

Following that, your shopping cart opens up, where you can configure your domain registration, such as auto-renewal and billing options. Similarly, you can also insert domain privacy right here. Lastly, click the “Confirm Order” button.

If you haven’t logged into your account yet, then Namecheap lets you do that first. So, register an account on Namecheap (if you don’t have one) or log into your account (if you already made one).

Learn how to sign up for an account on Namecheap from their detailed documentation.
Now, open your cart again from the ‘View Cart’ option, like before, and click ‘Confirm Order’.
Next, you must provide more information about your account, including the contact details. After that, click the “Continue” button.

Similarly, configure the Whois contact information if you require it and hit “Continue”.

Now, choose a payment method, and accordingly, insert the payment details. In addition, you must set up the receipt details and renewal settings. Once you’re done, press “Continue”.

Lastly, you’ll get a summary of your order. After finalizing, hit ‘Pay Now’.

After a while, you’ll get redirected to a different page with your order details. There, you can click the “Manage” button to go to the domain settings page. Your Namecheap dashboard will open up with your domain added to your account.
You can learn the entire process of configuring the domain name here!
Congratulations! This completes the purchase process for your registered domain. But the steps don’t end here!
Step 3: Verify Your Domain Ownership
Right after the purchase, you’ll receive an email from Namecheap at the registrant email address you provided. In fact, you’ll also receive an email if there’s ever an edit to the Registrant’s contact fields.
But why? This is the ICANN Whois verification email essential for the Registrant’s contact information for generic TLDs (gTLDs). This process occurs for new registrations and changes in contact details.
Hence, you must verify the contact information (first name, last name, and email address) within 15 days for new registrations. Same for contact updates, but within 7 days.

If you fail to do so, then there’ll possibly be a temporary domain suspension by the registry. So, how can you verify?
The verification email contains a link to confirm the contact information. For domains with privacy protection, the verification process still applies. In fact, users can manage and verify their domains through their Namecheap account.
Learn the details of managing and verifying your domains in this documentation.
Step 4: Protect Your Domain Name
Amazingly, Namecheap domain privacy protection service is free for life for every new registration or transfer. Moreover, its Whois privacy service provider, ‘Withheld for Privacy’, also keeps your website safe by hiding your contact details.
As we went through the steps before, you’ll get this domain privacy protection service at the time of the domain purchase itself.
But if you didn’t enable adding this service to your domain during that time, then you can still do it from your Namecheap dashboard.
Just open your Namecheap dashboard and navigate to ‘Domain List’. There, open the domain to which you want to add the privacy protection service by clicking its ‘Manage’ button.

Now, on the ‘Domain’ tab, enable ‘Protection’ with its ‘WithHeldforPrivacy’ service. That’s all!

Other than that, the following list shows the additional domain protection features of Namecheap:
- PremiumDNS: For less than $5 per year, you’ll get DNS service, keeping your online business uptime worldwide.
- Domain Vault: For maximum domain privacy protection, you can purchase Domain Vault through Namecheap.
- SSL Certificates: Namecheap SSL certificate offers site protection against identity theft. Surprisingly, you’ve got basic to in-depth validation options.
- FastVPN: Provides a cheap VPN service to secure all your devices, resulting in the protection of your domain privacy as well.
- Two-Factor Authentication: Namecheap offers 2FA, keeping your domain secure for free.
Do you want to secure your domain name further? Here’s a complete guide to that.
For example, you can purchase PremiumDNS right from the same settings. Further, you’ll find advanced DNS settings and the SSL certificate addition option on your dashboard too.

That’s all you’ve got to do to purchase and register a domain name for your website on Namecheap.
Step 5: Connect Your Domain with a Web Host
Once you’re all set with your domain, you can connect it with a web host for making your website available for everyone. For that, we highly recommend Bluehost. Here’s a quick look at the connection process!
- Log into your Bluehost dashboard and open ‘Domains’.
- Click ‘Assign a domain to your Control Panel account’ in Shortcuts.
- Determine you’re about to insert the domain you’ve in your Bluehost account.
- Verify your domain ownership and update your nameservers.
- Choose the domain and subdomain, followed with clicking ‘Add Domain’.

To get the step-by-step guide on this procedure, check out this article by Namecheap.
If you want to connect your domain to a different web hosting provider, then you can check their tutorials or documentation. Otherwise, you can also directly contact their hosting support for ideas.
2. Using Hostinger (Hosting + Domain Free for 1 Year)
The next method is to purchase a hosting plan from Hostinger and get a Hostinger domain free for 1 year. While purchasing a hosting plan, make sure to get a plan for 12 months or a longer period.
Here, we’ll briefly demonstrate how to buy a hosting plan.
First, log in to the official Hostinger website, then go to “Hosting” menu. There, choose the hosting plan, for this guide, we’ll choose “Web Hosting.”

Following that, click on “Choose Plan,” depending on your price range.

On the next page, you get to choose the plan on a monthly basis. As we need a free domain, so choose a plan for 12 months or higher.

Now scroll down, there you’ll need to select the payment method and enter your billing details.

There, you’ll see you’re getting a domain for free.
Besides, if you have a coupon code, then enter it in the designated section and click “Apply.” Once done, click on the “Submit Secure Payment” button.

That’s it! Once your payment is processed in the system, you’ll be ready to set up your hosting plan.
After you’re done with hosting, let’s see how to register your free domain.
But first, you need to make sure that the domain you want is available or not.
Step 1: Check Domain Name Availability
In order to check your domain availability, Hostinger provides a platform to check your free domain. Simply type your chosen name along with your desired domain extension in the domain checker tab, and then click the “Search” button.

After that, you’ll see whether the domain is available or not. If it’s not available, you don’t need to worry, it’ll also display several options available for your domain.

Now that you’ve chosen your domain and your hosting is ready, let’s claim and register your domain name.
Step 2: Claim and Register Your Domain Name
You can register your free domain from your Hostinger home page. Under the “Account Action” option, just enter your domain name and click the “Claim Domain” button.

The domain you register for free will be active for 1 year. If you wish to keep the domain after that time, then renew it at the regular rate before the expiration date.
Sete 3: Verify Your Domain Ownership
Verifying your domain with Hostinger is an important step to ensure security and enable smooth integration with their services.
Here’s a simple guide on how to do it using a TXT record:
When you’re setting up your domain with Hostinger, you’ll receive a TXT record. It’s a piece of text that you need to add to your domain’s settings.
Now, you’ll need to access your domain’s DNS (Domain Name System) settings. So, log in to your Hostinger account and go to the “Domain > Manage” option next to your domain.

Next, click on the Add record option and select the TXT record type:

There on the DNS Zone add your TXT record from your email and save the changes.
Also, remember, that changes to DNS settings can take up to 24 hours to fully take effect across the internet.
Once the changes have circulated, this means your DNS changes are fully active. Now, you can easily add your website to your Hostinger hosting plan.
This step ensures that your domain is securely linked to your hosting service without any issues.
Verifying your domain with a TXT record might sound technical, doesn’t it? But it’s a straightforward process that ensures your website works smoothly with Hostinger.
Step 4: Protect Your Domain Name
Once you’ve claimed and registered your domain name, it’s important to take steps to protect it. Domain protection is crucial to ensure that your domain remains secure and that your personal information is kept private.
Here’s how you can protect your domain name.
Start by logging in to your Hostinger account and navigating to the “Domains” section. There, find the domain you want to protect and click “Manage”.

Next, look for an option to enable Domain Privacy Protection.

This service will replace your personal information with generic information in the WHOIS database, keeping your details private.
And you’re done!
Besides this, adding an extra layer of security to your Hostinger account is essential.
- Two-Factor Authentication (2FA).
- Use strong, unique passwords for both your Hostinger account and the email address associated with the domain.
- Enable auto-renewal for your domain. This ensures your domain is automatically renewed each year, preventing accidental expiration.
- Ensure the contact information associated with your domain is always up-to-date. So you won’t miss crucial notifications about your domain’s status.
Therefore, taking these steps will give you peace of mind and allow you to focus on growing your website without worrying about potential threats.
Learn how to secure your website in detail with this ultimate guide.
And that’s all for the guide on how to purchase a website domain name.
Frequently Asked Questions (FAQs)
Wait up! Here are some FAQs you shouldn’t miss out on. Check them now!
1. How do I choose a domain name?
Choosing a domain name involves considering several factors. That includes its relevance, length, use of keywords, simplicity, and uniqueness. Please avoid adding numbers and hyphens to your domain.
2. What are domain name extensions, and which one should I choose?
Domain name extensions are the suffixes at the end of web addresses. Every domain extension can be used for specific site niches. Among the popular domain extensions, we recommend going with .com, .org, .net, .edu, or .gov as required.
3. Can I get a domain for free?
Yes, you can get a domain for free. Some domain registrars or web hosting companies offer free domains. For example, purchasing Hostinger, Bluehost, DreamHost, or even Namecheap hosting provides a free domain for 1 year.
4. Which domain name registrar is the best?
There are several domain name registrars; among them, we recommend Namecheap for its affordable prices and Hostinger for the free domain name that comes with the hosting plans. Others include Domain.com, Bluehost, GoDaddy, etc.
5. What if the domain name I want has already been taken?
If the domain name you want has already been taken, then you can perform multiple actions. You can check its availability with other suitable extensions, use a different variation, purchase it from the current owner, or register a different one.
Conclusion
This concludes our journey on how to purchase a website domain name. In this tutorial, we’ve covered the essential steps to acquiring a domain name.
Hopefully, you can now purchase and register the right domain name for your website. By following these steps, you can secure the perfect domain for your online presence.
However, if you face any confusion, then don’t hesitate to drop a comment below. We’ll try to address your queries and guide you toward a successful purchase.
In addition, you can read our similar articles on the different types of domains and the cheapest email hosting services.
If you found this article helpful, then why not share it with your friends and colleagues? Follow us on Facebook and Twitter for updates!